Pinterest strikes again.
I wouldn’t characterize myself as a Pinoholic, but I have been known to spend my down time scrolling through endless photos of DIY projects, impossible recipes and exotic places. I call it digital hording. The ideas are inspiring… and don’t take up any extra space in my office.

Ok, so maybe I am a Pinterest addict. But please tell my husband it was worth it, because I came across a barn wood farm table like this! It gave me the crazy idea that I could build a table for our cabin out of picture frame moulding… and not just any moulding. I was going to use the moulding I helped design; the AXEL frame from Larson Juhl.
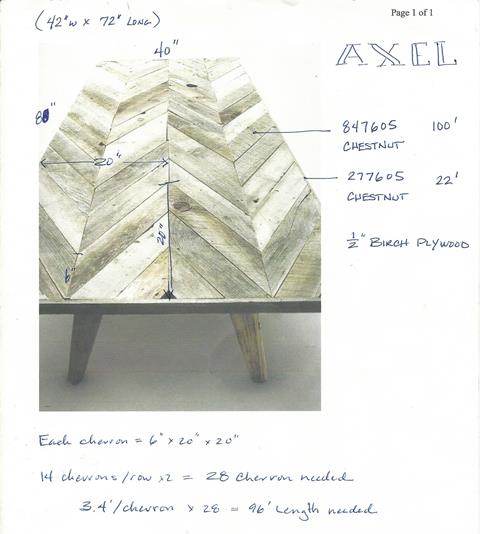
Pinterest Pic with Notes
After being a professional framer for over twenty years, I can absolutely shout from the mountain tops that working with the design team at Larson Juhl was the most exciting experience I’ve ever had. As it turns out, winning LJ’s Design Star award had many perks. Working with these two and the manufacturing team in Italy to create an exclusive frame collection was a treat beyond belief!

Doug Rozenboom, Myself & Paula Jackson | Axel Launch | WCAF 2014
I had the privileged of joining the world’s best design team to create a new collection for the international framing industry. We spent a year working on this project. The frame collection “AXEL” is made from antique Italian chestnut that has been reclaimed from old beams used in Italian buildings. The wood has incredible character and history. Just think what it has seen? There are two colors; Antique Chestnut (which I used for my table) and Smoked Timber.
Back to the table idea… I had to build this! We needed a new dining table for our cabin in the mountains and I wanted to build the best “kick-ass” souvenir from my Larson Juhl experience. The Pinterest pic made me believe I could do it. So, here is how I made my table.
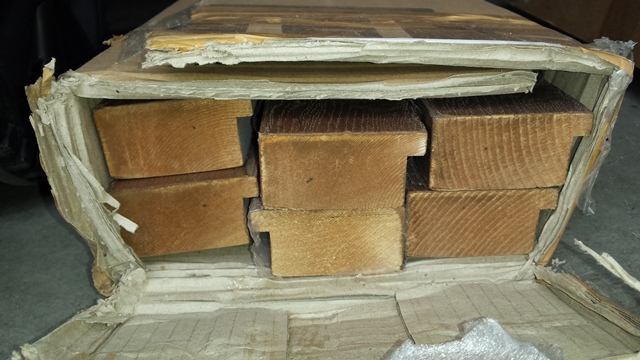
100′ of #847605
Let’s start with the 100 feet of length moulding I needed to build the top. It arrived in several boxes. The sticks were so beautiful. The chestnut wood had cracks and knots and was so pretty it almost seemed a crime to cut it up into 56 little pieces, but it had to be done. Let the chopping begin!
Laying the Pieces in Place
Each piece was cut to 15″ in length. The miters were glued and pinned together with V-nails. Then the chevrons were glued down to a sheet of 3/4″ birch plywood that was cut to 40″ x 80″. I filled in the ends with small pieces cut to size and the top was nearly finished, except for the trim. Time to call my handyman.
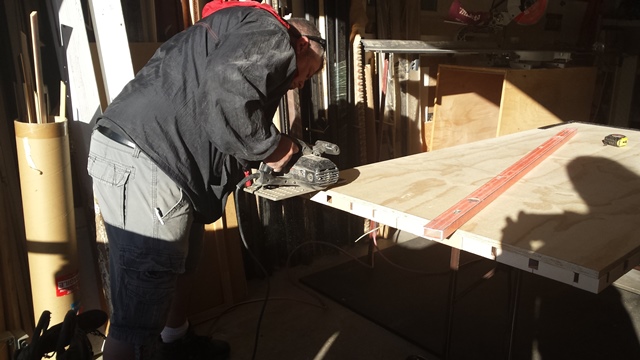
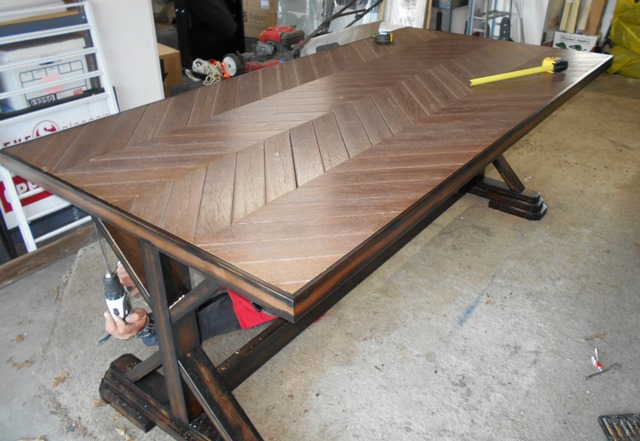
Trimming the Top
My friend, and expert cabinet maker trimmed the edges of the frames to ensure a perfect fit for the surrounding trim. To do this, we flipped the top over, so the sharp saw blade was less likely to splinter the frame edges. It worked beautifully. He was a huge help! He also built the trestle base and trim for the top. He stained it to match the upholstered benches I had on order. The finish was a combination of dark colored glazes applied to get a naturally aged finish like the benches.
Assembling the Table
To assemble the table, we bolted the base to the under-side of the table top and “Shazam!” it was all finished. I wrapped the entire table in bubble wrap for the long ride to it’s new home at the cabin.
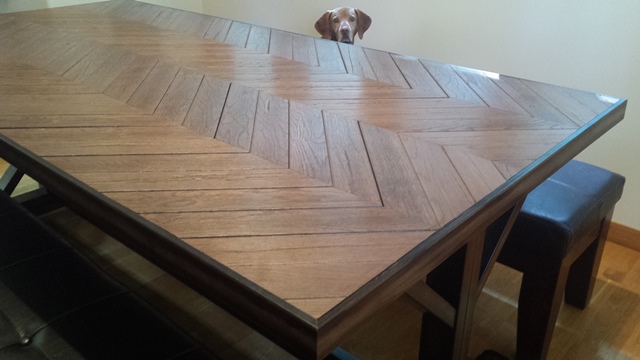
Tikka & the Table
We got safely in place (with Tikka’s help) and our sons Scott & Trevor doing the heavy lifting. Yes, you might have guessed 100′ of moulding, plus the plywood and the base made for a very heavy table!
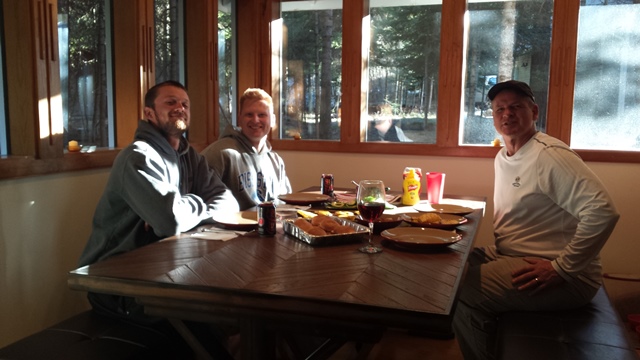
First Supper on the New Table
We christened the new table with a dinner of grilled hamburgers… and yes, that is my big-girl glass of wine. I think I earned it.

The Finished Axel Table
Leave A Comment
You must be logged in to post a comment.