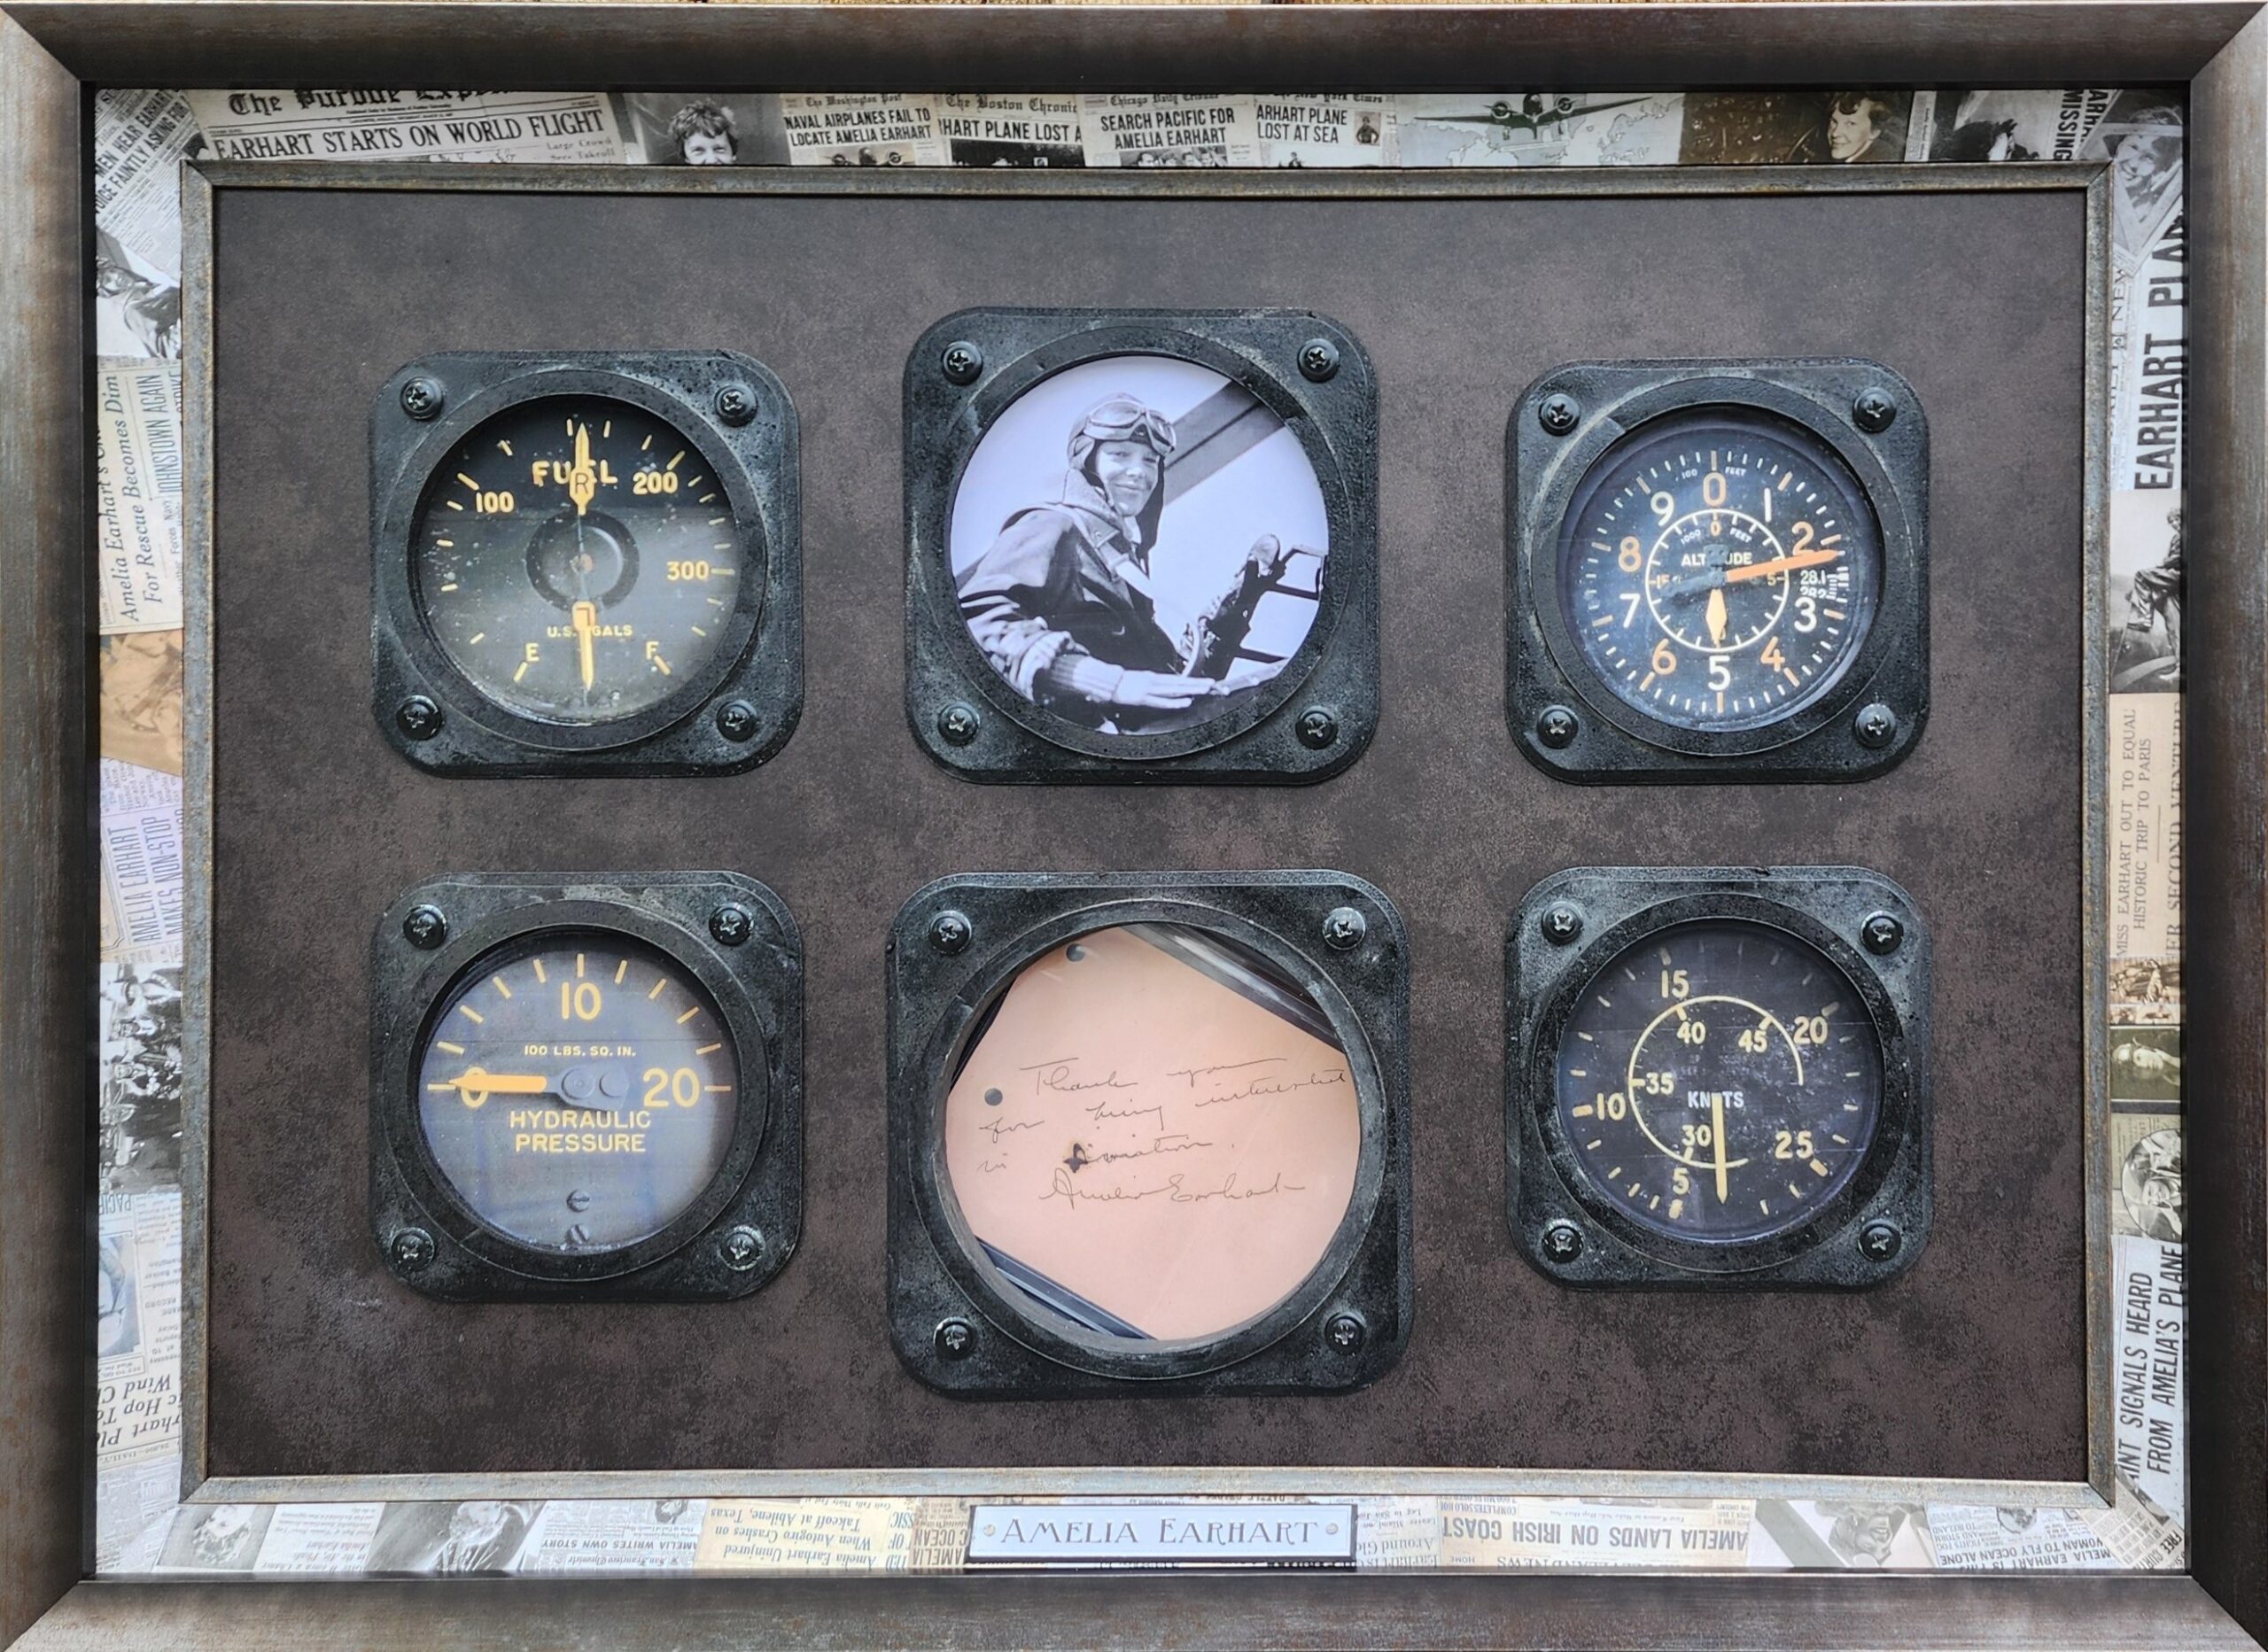
Nearly 90 years after Amelia Earhart’s mission to fly around the world ended in mystery, we were asked to preserve a note she had signed before her fateful trip. The clients brought us the note encapsulated in a protective case and challenged me to create a display that would tell more about Ameila’s story. This is the story of how we crafted this shadowbox frame.
Amelia Earhart’s Signed Note
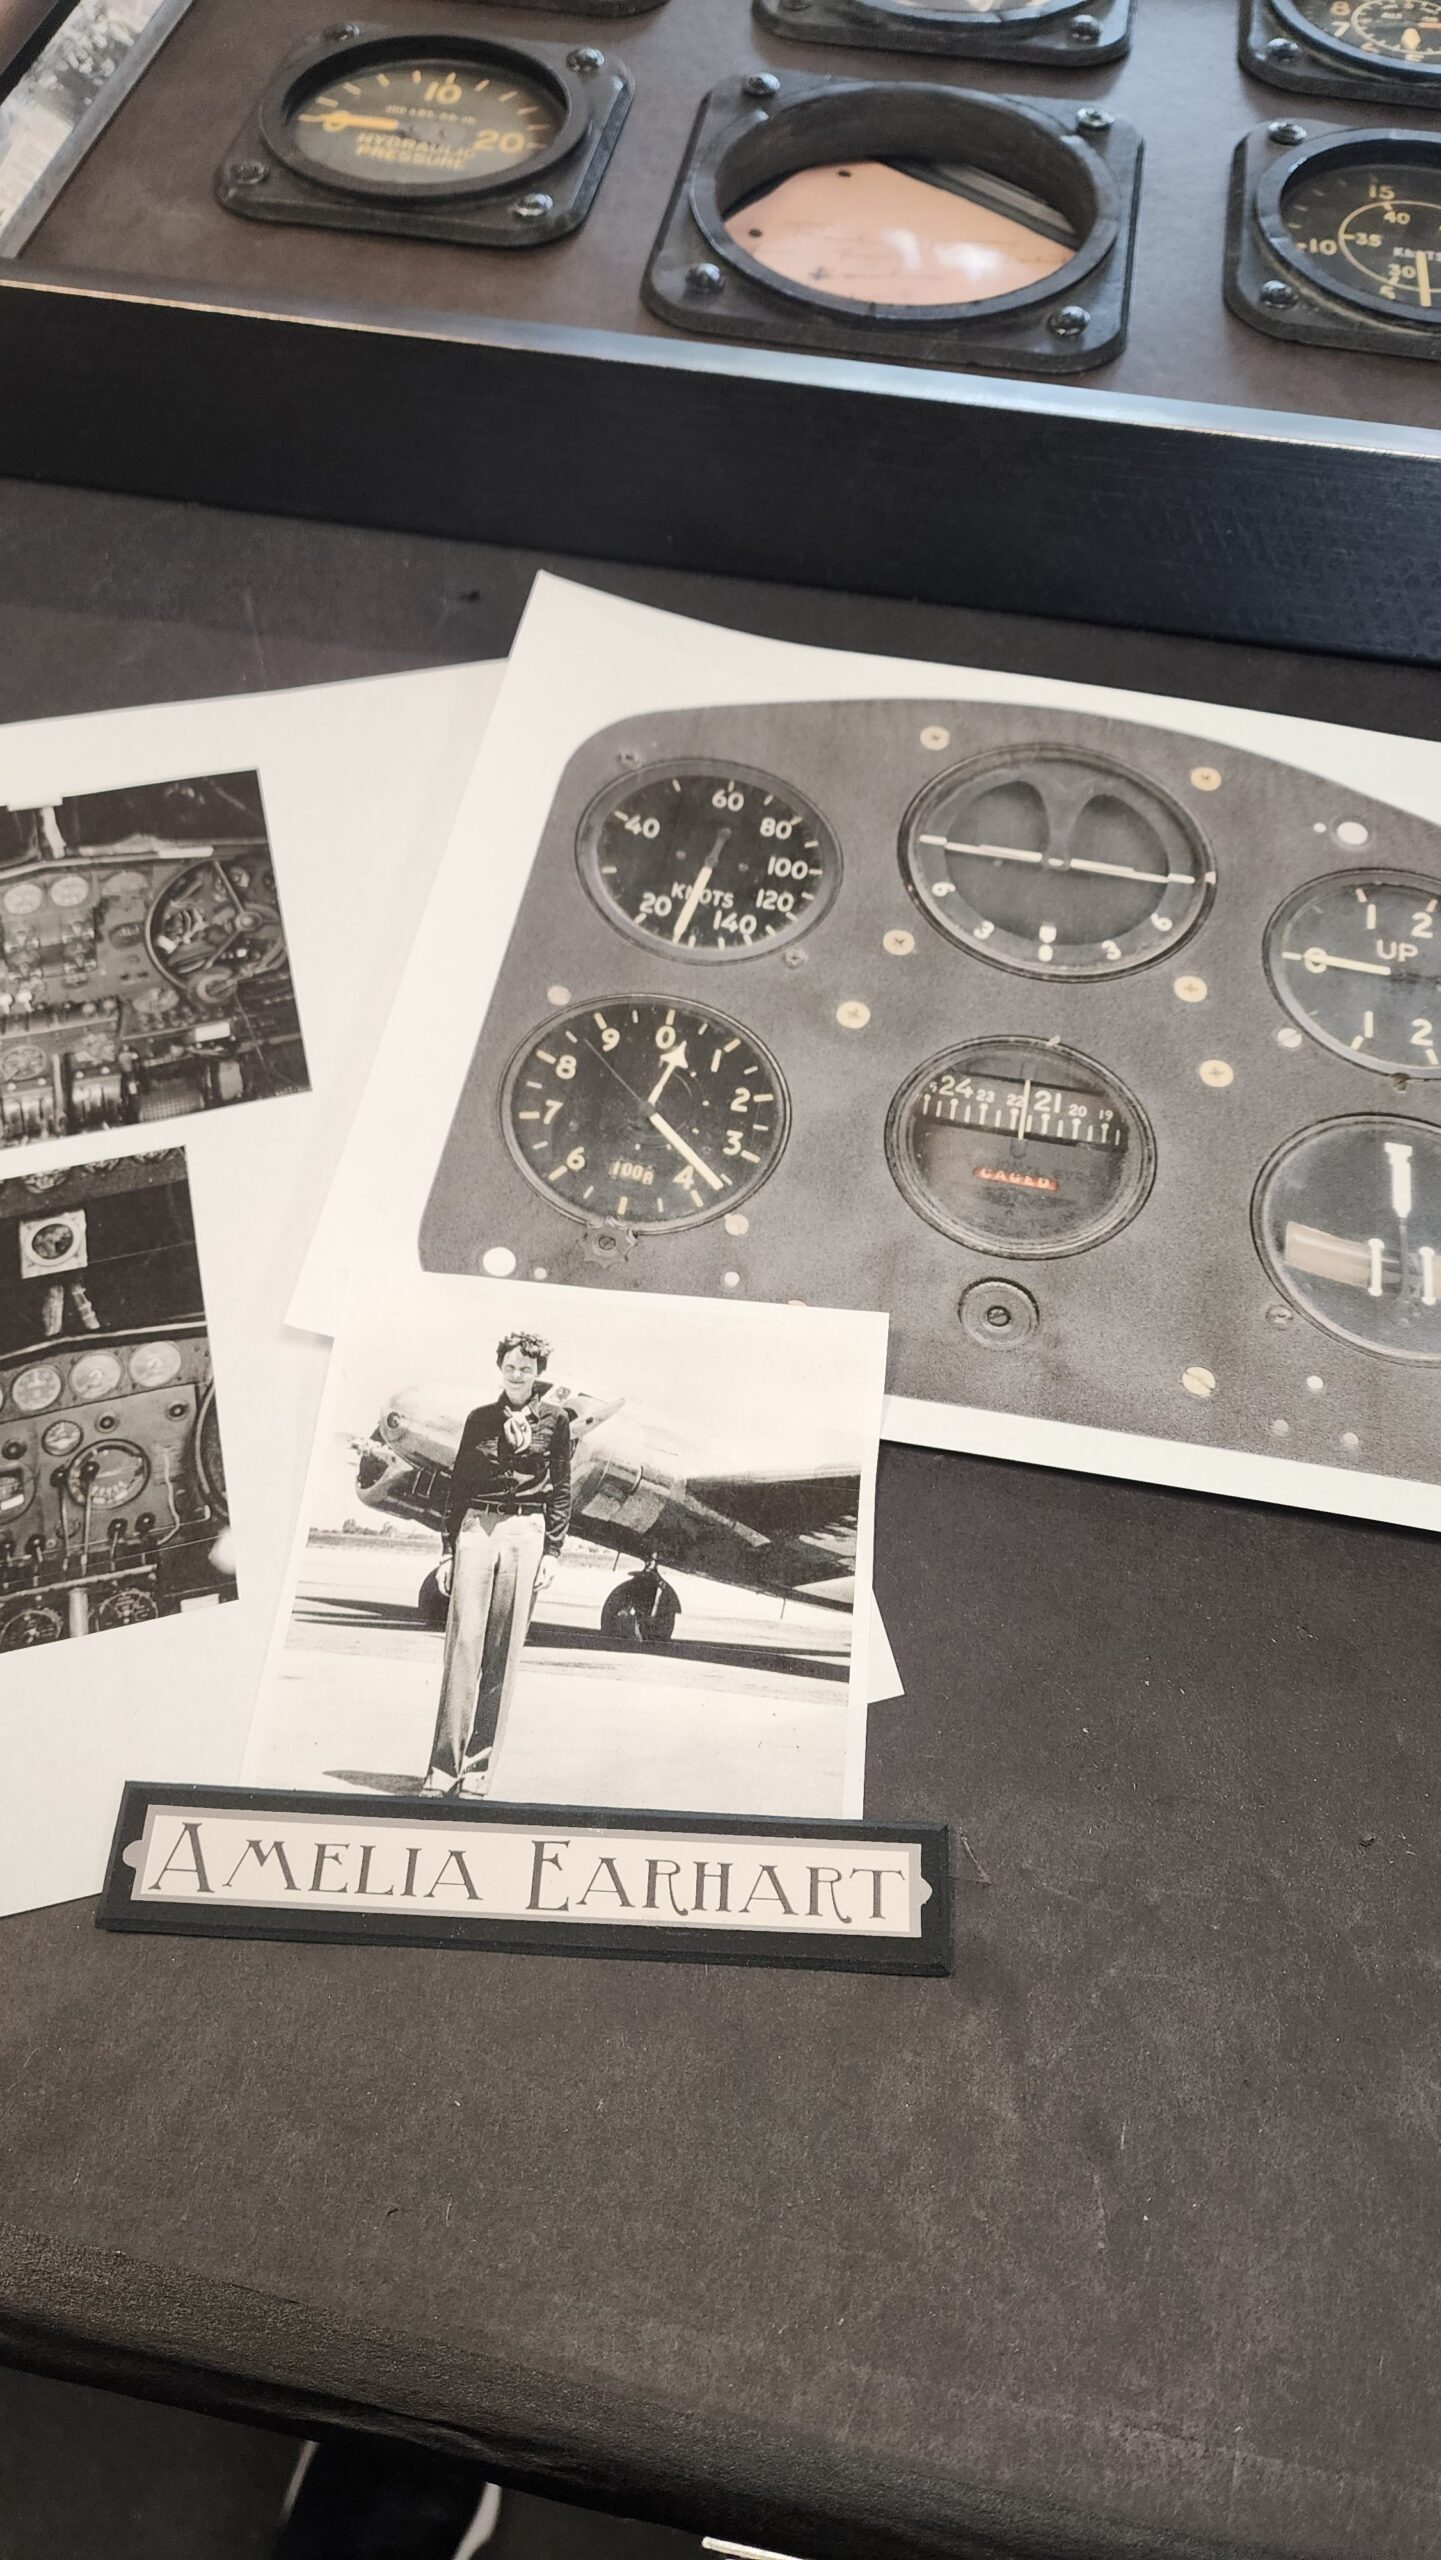
What made this project a challenge was the lack of items we had to work with. It all started around the note written on the pink desk stationary. It says “Thank you for being interested in aviation. Amelia Earhart” was purchased at an auction with the purpose of decorating their 1930’s prohibition themed speak-easy in Boise. When they brought it in, we talked about how we could frame it without disturbing the case and add photos that would help tell Amelia’s story and make the presentation more interesting to the bar patrons.
During the collaboration process with the clients, I did a quick web search that brought up several photos of Ameila in her plane. We settled on the one that we included in the project. Now we had two items. In the brainstorming session with the client we discuss how we might incorporate an instrument panel of an old airplane. That led me on another search to find old aircraft gauges that I could use inside the frame. As it turns out, they’re rare, expensive and too deep to easily use in a shadowbox. On to the next idea.
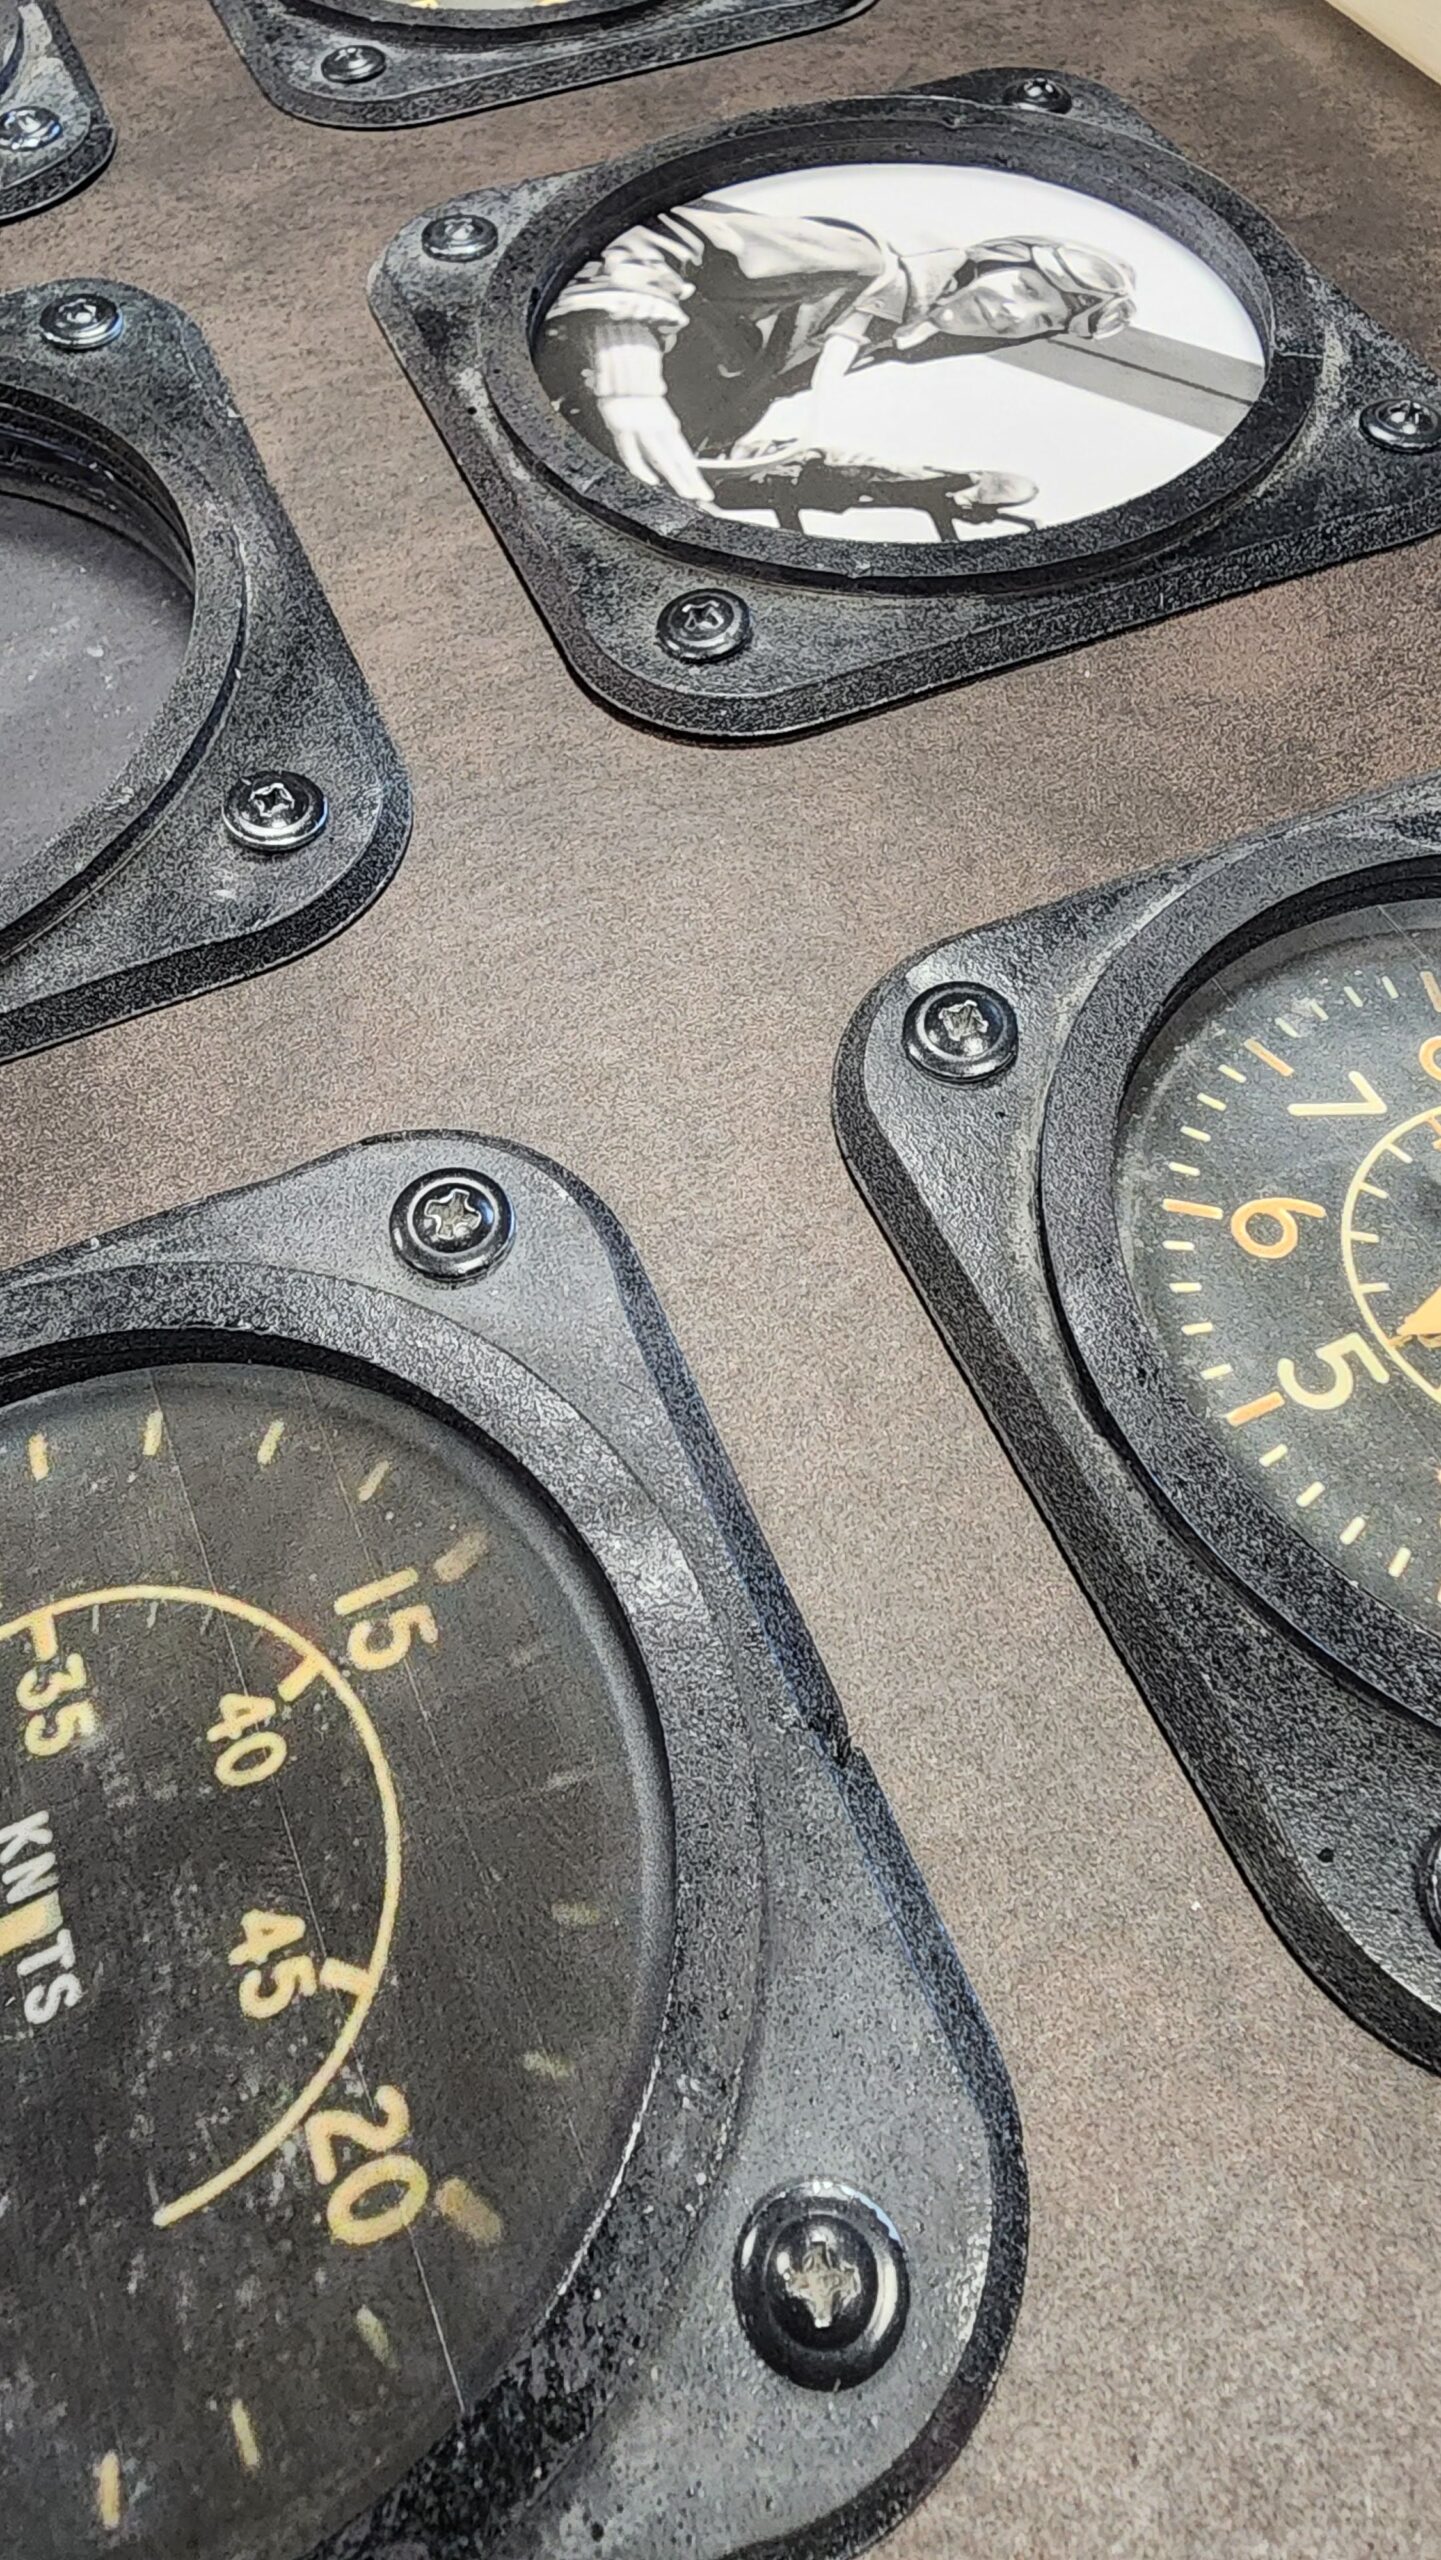
I wondered if I could simulate the instrument panel with materials I had in the shop. It was then that I turned to foam core and my Wizard CMC. Using a square template with rounded corners, I made my first cuts through the ⅛ inch foam without any problem. I used the 45 degree blade to cut the outside beveled edge and the 90 degree blade to cut the inside circle. One layer wasn’t going to be enough, so I used the 90 degree blade to cut a second circle ¼” wide and glued it to the first layer. To cover the layers and smooth the seams, I sealed the inside of the circle with a layer of wall spackle. This was a good start.
These foam core shapes would become the “gauges” and hold photos of the altimeter, pressure and fuel gauges I printed each from photos I found on the web. To make the foam core look more authentic, I distressed them by banging dents into them and used an airbrushing technique with layers of black, gray and silver paint. Screws were painted and added to the corners. It looked close to my vision, but it still needed more aging to be believable. I thought a dusting of rottenstone powder would do the trick. If you haven’t used it before, it’s a handy product to have in the shop for distressing wood finishes and giving a new finish a dusty old patina. It was perfect for making the foamcore gauges look more authentic.
Guages Detail
One of the challenges of this project was how to mount Amelia’s signature while in its acrylic case. I would have preferred to remove it, but the client requested to leave it in place. Not a problem, we built foam core supports around to keep it in place and make it level under the mat. The extra layers of foam had an additional benefit, the provided room for the screws.
One of the original objectives of the project was to tell Earhart’s story. In researching the famous aviator, I had come across dozens of newspaper headlines reporting on her journey across the world. I printed them on regular copy paper and used them to decorate the sidewalls of the shadowbox. To help them look the part of an old newspaper, I dusted them with brown pastel chalk. Then each headline was carefully glued into place.
Turning the side walls at a 30 degree angle allowed for easier reading, plus it balanced the angled slope of the frame. The coved walls were trimmed out with a coordinating fillet. On the bottom side, I wanted to add a name plate. For that, I turned to an online font generator (fontmeme.com) to find the right font style that fit the time period. After trying out a few, I found the best that fit my vision for the project. I printed the name and trimmed it out. The white paper was too bright, so a little dusting of rottenstone and it was perfect. I mounted it to a strip of dark matboard and added two little nails into the side wall.
The frame used in this project is Larson Juhl’s Eiffel Pewter #579110. Its 1 ½” depth was just the right height for the shadowbox. The matboard was a discontinued Crescent specialty mat I happen to have leftover from another project. For the glazing, we protected the project with Tru Vue’s Museum Glass to ensure clear visibility.
Watch the video of the construction of this project: https://www.instagram.com/p/C6wKIc0r3Cd/
If you have questions about what we could create for you, contact us here.
Leave A Comment
You must be logged in to post a comment.